I wrote a post a while back about a cat prop that I built for a movie that should be in theatres soon (see
previous post). My intention was to outline some of the steps involved, but only now have I had the time do it. So, here it is.
When I first set out to build the cat prop I was aware that I didn't have the time to order glass eyes and do all of the things that I knew would really make the cat be realistic.

The client noted that the prop would not need to have a realistic face because it would be used it a very quick shot and would not show the face. So admittedly, the face is not that realistic. But there were a few steps I took to make the cat as "realistic" as possible.
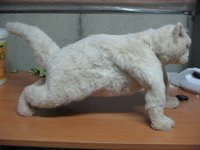
The first thing I did was to find the right fur fabric. I opted for a light cream fur and did some tests using acrylic paint to see if the colouring worked. I was happy with the results, so I decided to carve the cat head out of a small block of foam.

The thing that I always think about is how much of the understructure will be seen with fur or fabric covering it.
I think it is an important thing to consider especially when considering the actual details you want to be seen.

I knew that the cat's face needed to be covered with fur, so the face was carved small enough to accomidate the bulk of the fabric that would later be applied. This is why the carved foam face looks so small and weird.

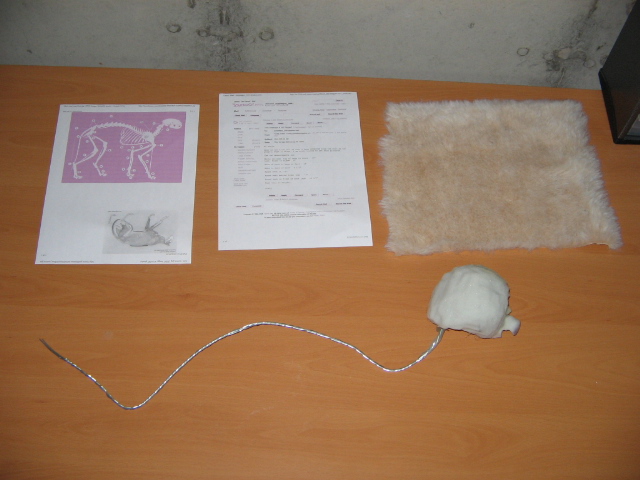
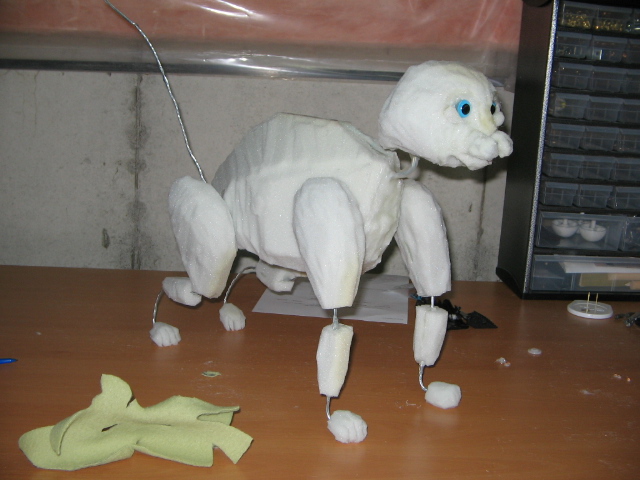
The next thing I did was print up drawings of cat anatomy to help with the possible armature that was inside the prop. The prop needed to have the ability to be posable, so I opted to use a wire understructure.

I built up the body (due to the fact that the prop needed to be able to "bounce off of a wall when thrown") with foam.

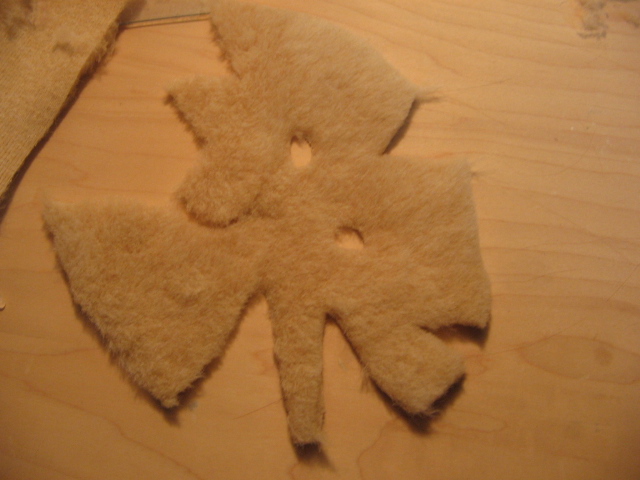
The next step was to create the fabric pattern for the cat's face. I used a piece of fabric and pinned the fabric over the carved cat's foam face.

I cut away the extra fabric to create the pattern that I would later transfer over to the fur fabric. I decided to use a pen to outline where I would cut the fabric out for the eyes.

The wire armature was done using the anatomy pictures as references. The face pattern is done as well and ready to be transfered to the fur. I realized that with the bulk of the fur, there was no need t
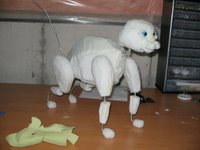
o add foam or anything else to the tail itself. As a result I just left the wire bare. Feet, legs and body all had foam as a part of their bulk.

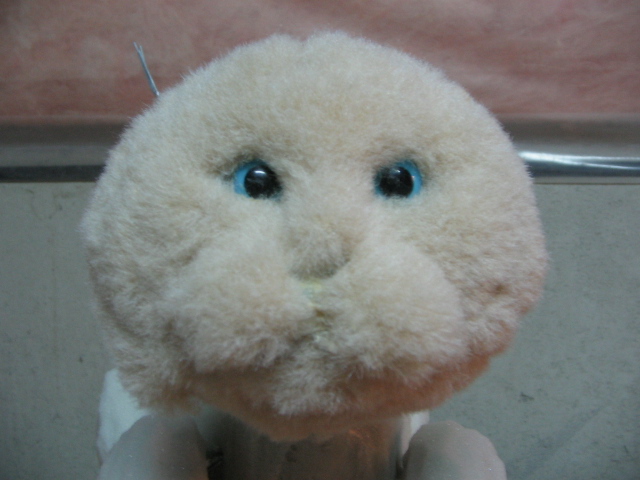
Next the pattern was transferred to the fur fabric. I carefully cut the fabric out and prepared to attach it to the foam cat head.

I opted to use contact cement to adhere the fur to the cat's face and to press down details that I knew I wanted. If you notice, the actual bulk of the face is quite a bit larger than the original sculpt.

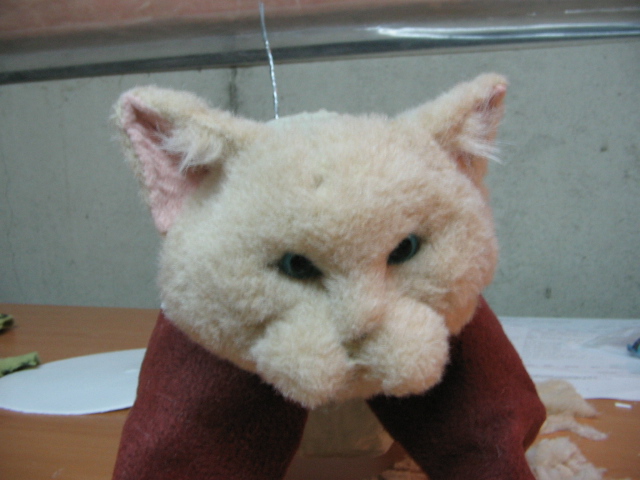
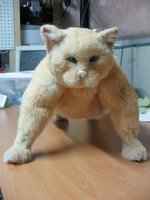
The cat is now ready for me to add the fabric to the body of the prop. I added pink fabric to the inside of the cat's ears, and started to pattern the body.

I followed the same process as with the cat's face pattern. Pinning and cutting until I had the shape I needed.

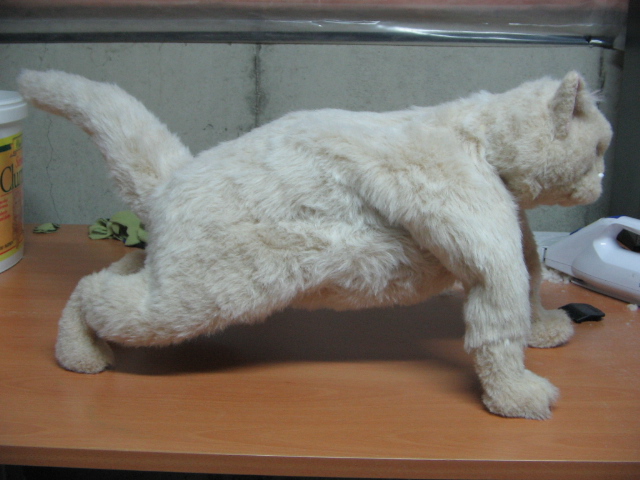
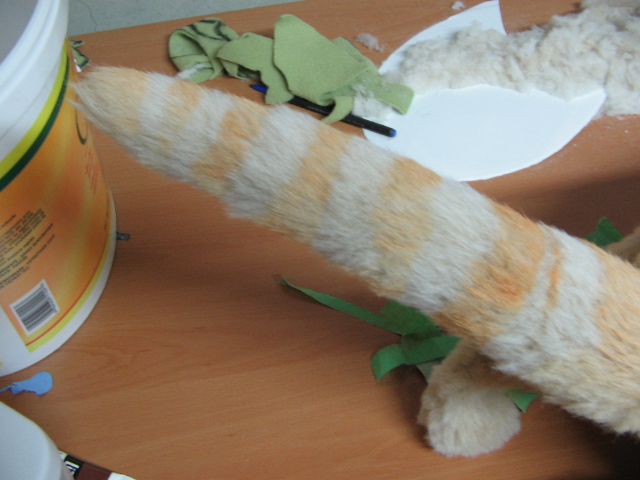
Here is the cat with the cream coloured fur on his body. The tail is the only fabric that had not been added yet.
I then cut and sewed the tail together, finally adding it to the cat body to finish the overall fabricing process.
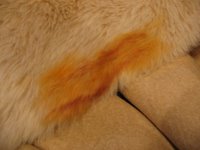
It was now time to paint the cat a base orange colour. I used acrylic paints to achieve the overall colour that I wanted. The cat was coloered with this base colour.

I was sure to add painters tape to the sections of the cat's tail that I wanted to should the cream colour.
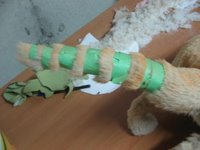
Painter's tape is easy to remove and proved to be a great choice for this project.

After I removed the tape, you can see how the effect worked. We now have a tail with rings of colour. Perfect!

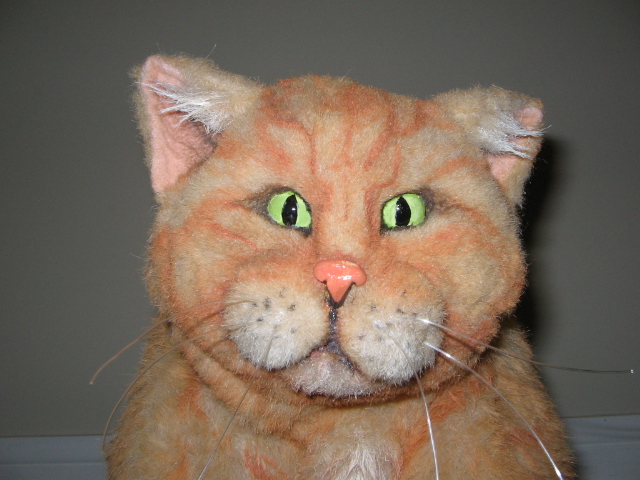
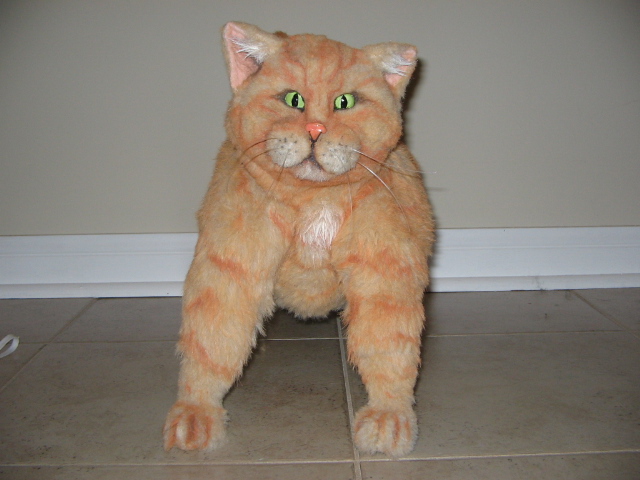
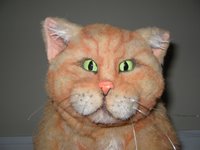
Finally, I added darker colour lines for the variations on the cat's fur. At this point it is practically finished.

Add whiskers, paint the eyes, add any final deatials and highlights, and you are done. A fairly realistic cat prop ready for it's big screen dedut.
I hope you've enjoyed this tutorial and that you are able to use some of the information on your next project.
Enjoy!


 I have been building a couple of monkey puppets for the opening sequence and as background characters for this project. Here is one of the puppets with a rough outline for the pattern that I will use to create him. The arms have been sewn together using a sewing machine, I made the arms longer than normal because he is...well...a monkey.
 Here is the first one that I have worked on. You can see he is just at the beginning stages of construction. I find that pinning pieces to the foam skeleton helps with construction. As you can see the arms, body and the back of the head have all been assembled.
 Here is the puppets with some more progress done. Hands and arms are ready to be sewn. I use a combination of hand and machine sewing. When attaching the hands to the arms and the arms to the body, I opted to use hand stitching.
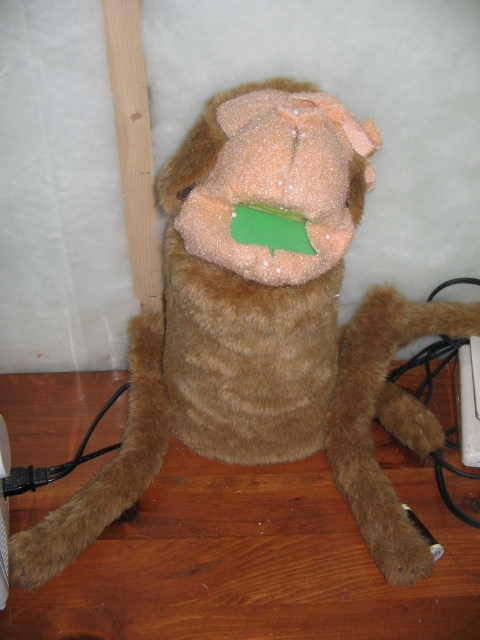
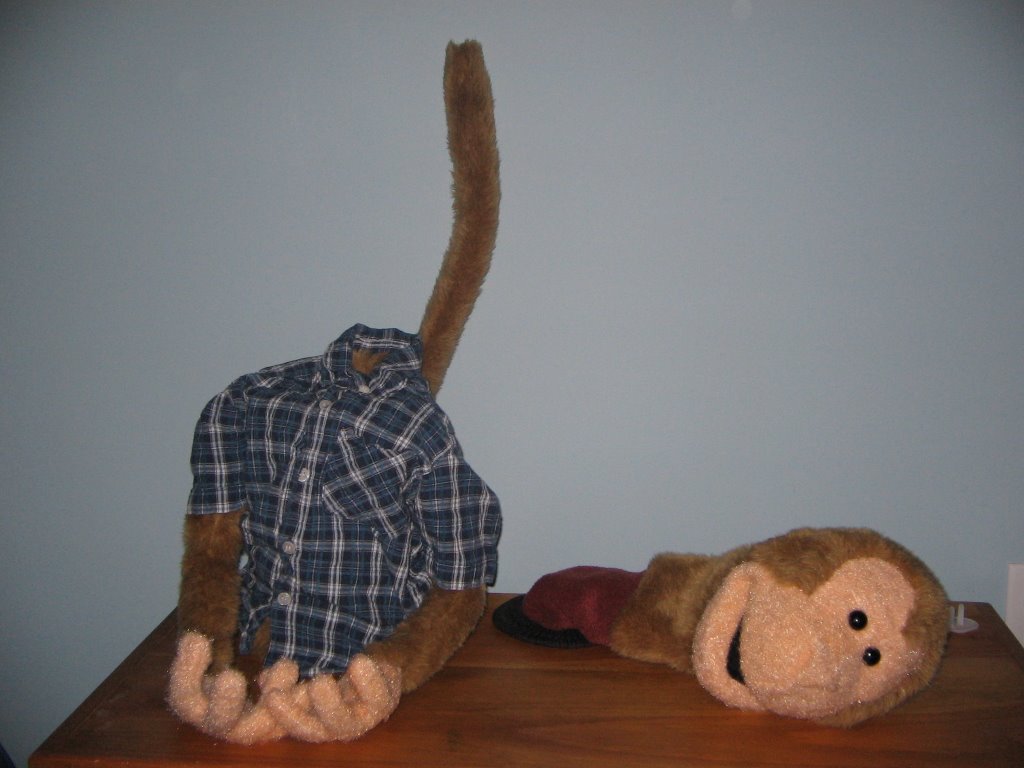 It looks grim I know, but here is the puppet with eyes added and head off so I could work on it better.
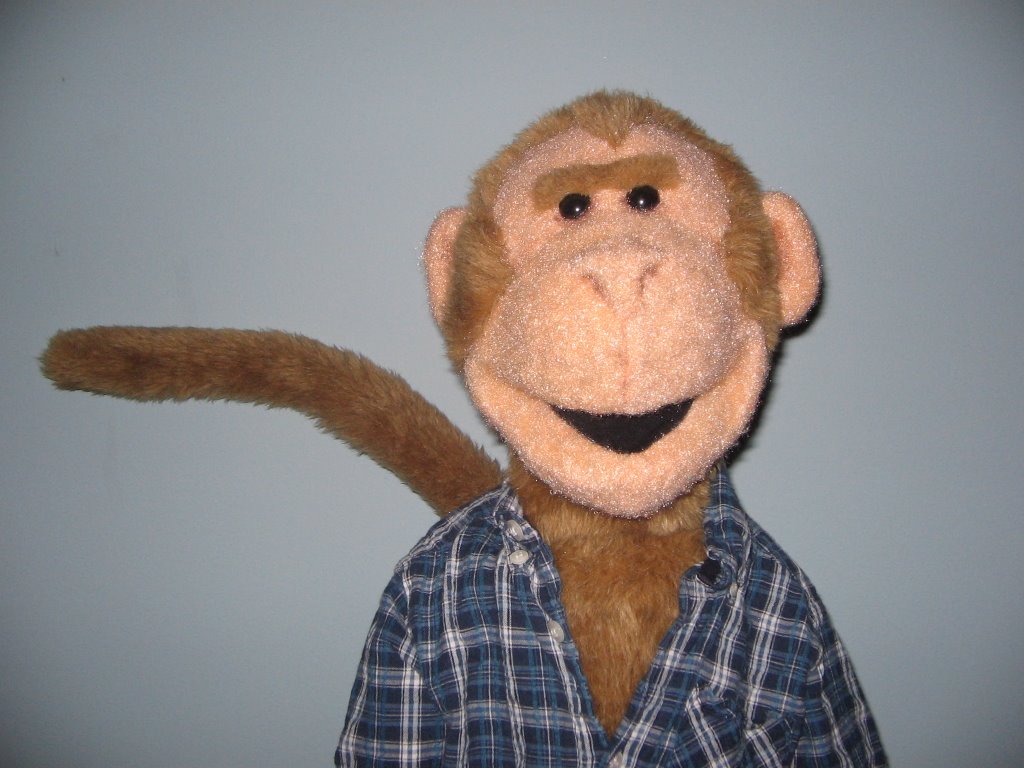
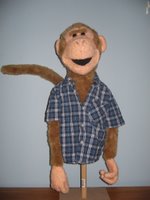 And here he is with everything assembled. I thought that I would put less effort into his construction because he was a background puppet, but I realized that I just can't do that. Any puppet I build is a reflection of me, so I put everything in to it. It's amazing the things I learn about myself as a builder.