

My Project Puppet.com Chewbacca!

Well after the great response from my Darth Maul puppet, I decided to use another Project Puppet.com pattern. This time I chose to use the Punto pattern to create Chewbacca from the Star Wars universe.
Just to clarify I have built this puppet just for fun and for myself (I can not and will not build-to-sell any characters to which I do not have the copyrights for). When I started this puppet I did not have the luxury of a fabric pattern for the Punto foam head. Luckily now they do have one, but I made mine from scratch.
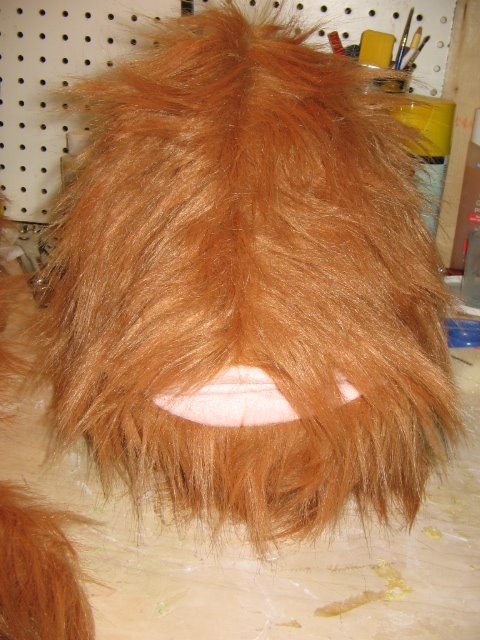
 I started the process by assembling the foam Punto head following the instructions from the pattern. Once that was done I glued the mouth father than instructed and built up the area above and below the mouth to create the "Chewbacca-ish" mouth. I also added a build up of foam for the bridge of the nose and the eyebrow ridge.
 After creating a smaller mouthplate to fit in the head I assembled these parts and sewed the fabric head pattern (that I created) and fitted it over the foam head. The body was made following the Punto instructions, but the arms were made from my own pattern.
 I created Chewie's nose out of FIMO and I would often use it to help me get a sense of the overall look of the puppet.
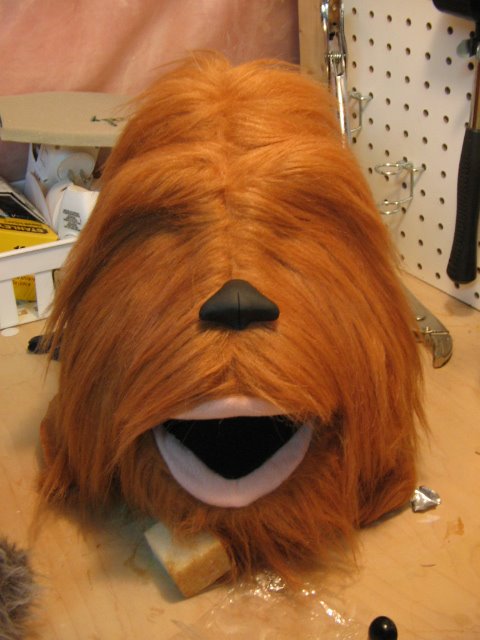 I added glue around the eye sockets and sides of the nose and pressed the fabric down to get a more defined shape to the puppet's features. And once again I used the nose to see how everything looked. It is starting to look a little more like our old pal Chewie.
 I then used an airbrush to add shadows to the eys and nose area, as well as down the sides of the mouth. With the head, arms and body done I started to work on the eyes and Chewie's ammo belt.
 I took standard craft eyes from the local craft store and spray painted them white with a great spray paint designed for plastic called Krylon Fusion. I then glued black fabric to makke the upper and lower lids on the eyes.
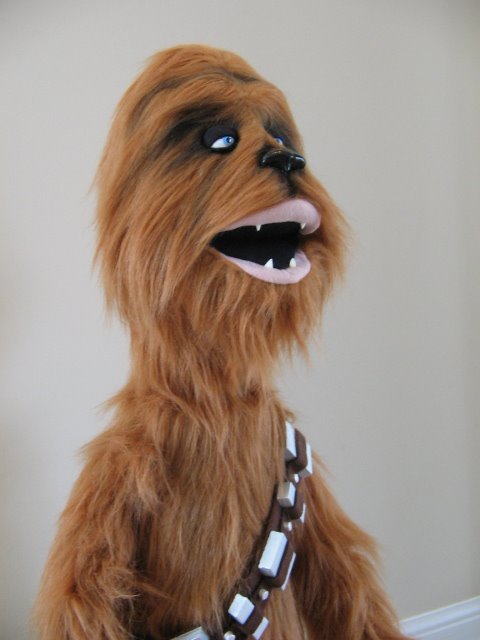
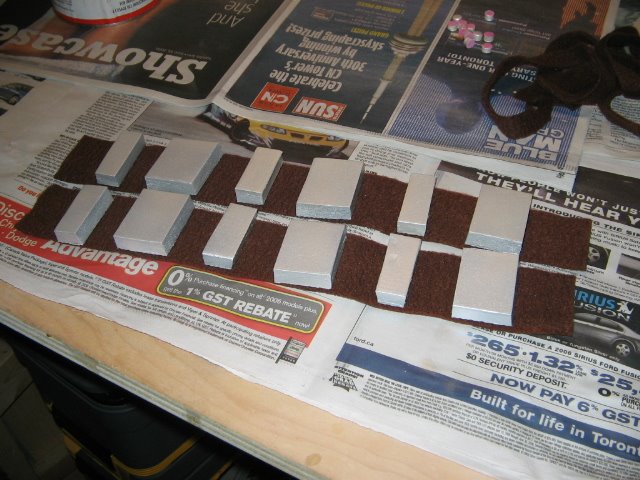 For Chewie's ammo belt, I simply took a piece of brown fabric, cut rectanlges out of some foam I found at the dollar store, craft foam, and some silver acrylic spary paint. I cut the foam shapes, painted them and then glued them on the brown fabric.
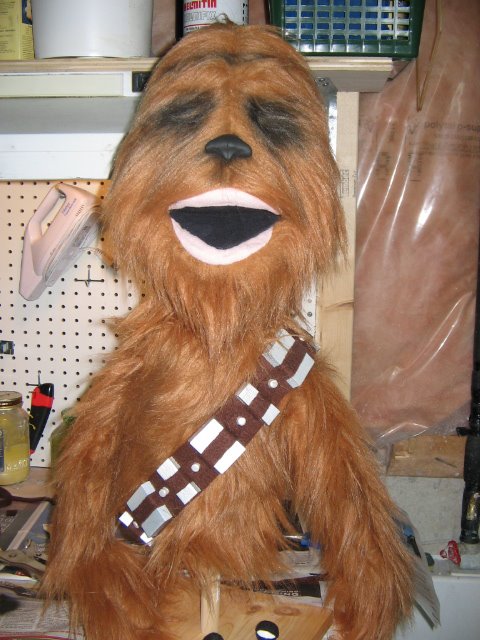
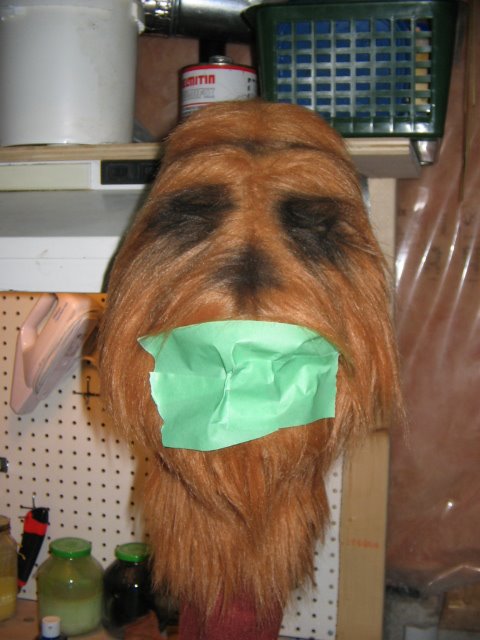
I decided to add more black to his eyes and nose area, so I had to tape his mouth to make sure I didn't paint inside his mouth by accident. The body was assembled and the head was attached to the body. Then the nose and ammo belt was attached.
 The eyes were attached to the head, but the pupils will be added later. I always like to add the pupils as one of the last stages. It really gives the sense of a complete puppet. At this stage however it looks as if Chewie is a zombie. Still, it is at this point that I am able to actually look at the puppet and see how close I am to my original vision.

 Finally, small details are added.
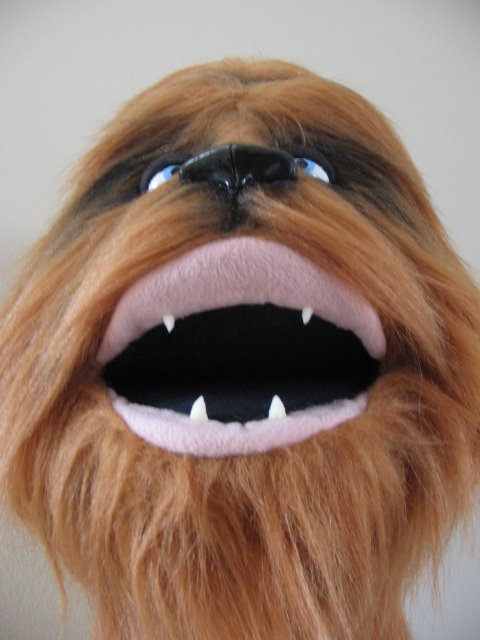
I used electrical tape for the pupils, makeup sponges for the teeth and I added a clear acrylic gloss medium to the nose and eyes to give a wet look. I am happy with the results. I hope you enjoyed the process and the final product.
May the force be with you.
posted by Kanja Chen at 6:18 PM
![]()

2 Comments:
Great! thanks for sharing
I am going to make my own
Great!
Thanks for sharing.
I think I am going to make my own!
Post a Comment
<< Home